Simple deployment pipeline
This recipe walks through the process of setting up a simple deployment pipeline using Onboardbase.
Typically, a deployment pipeline has 3 main parts:
- Development - Where the code is written and tested, usually in a developer's machine.
- Staging - Where the code is tested in a production-like environment.
- Production - Where the code is deployed to be used by end-users.
Onboardbase makes it easier and faster to work with secrets in all three environments securely.
1. Development
1. CLI Login
After installing the CLI, you'll need to login to your Onboardbase account. You can do this by running the onboardbase login command:
onboardbase login
Logging in via browser generates a device token that the CLI uses to authenticate with the Onboardbase API.
2. Setup
Run the setup command to create an Onboardbase configuration file containing your project name and your development environment:
onboardbase setup
This will create a onboardbase.yaml file in your current directory.
3. Running commands
Onboardbase injects environment variables at runtime using the onboardbase run command.
All you have to do is to encapsulate your scripts with onboardbase run -c:
onboardbase run -c "echo $MY_SECRET"
You don't need to change your code to retrieve environment variables as Onboardbase secrets act like regular environment variables.
4. Adding missing secrets
You can add secrets as JSON key-value pairs from the web dashboard but also via CLI:
onboardbase secrets:upload '{"name":"value", "db_url": "value"}'
The whole point of using a secret manager is to avoid having secrets in your codebase, like in .env files. Not only does it make it easier to work collaboratively with synchronized environments, but it also makes it easier to rotate secrets when needed since you just have one source of truth.
If for some reason you need to override values or keep secrets local, you can update your onboardbase.yaml like so:
setup:
  project: frontend-marketing
  environment: development
  prefix: REACT_APP
secrets:
  local:
    - DATABASE_URL: 2314
  	- SSH: |
        -----BEGIN OPENSSH PRIVATE KEY-----
        b3BlbnNzaC1rZXktdjEAAAAABG5vbmUAAAAEbm9uZQAAAAAAAAABAAABlwAAAAdzc2gtcn
        NhAAAAAwEAAQAAAYEAsEPa5nGQh+f6+ixqs==
        -----END OPENSSH PRIVATE KEY-----
2. Staging
1. Service token
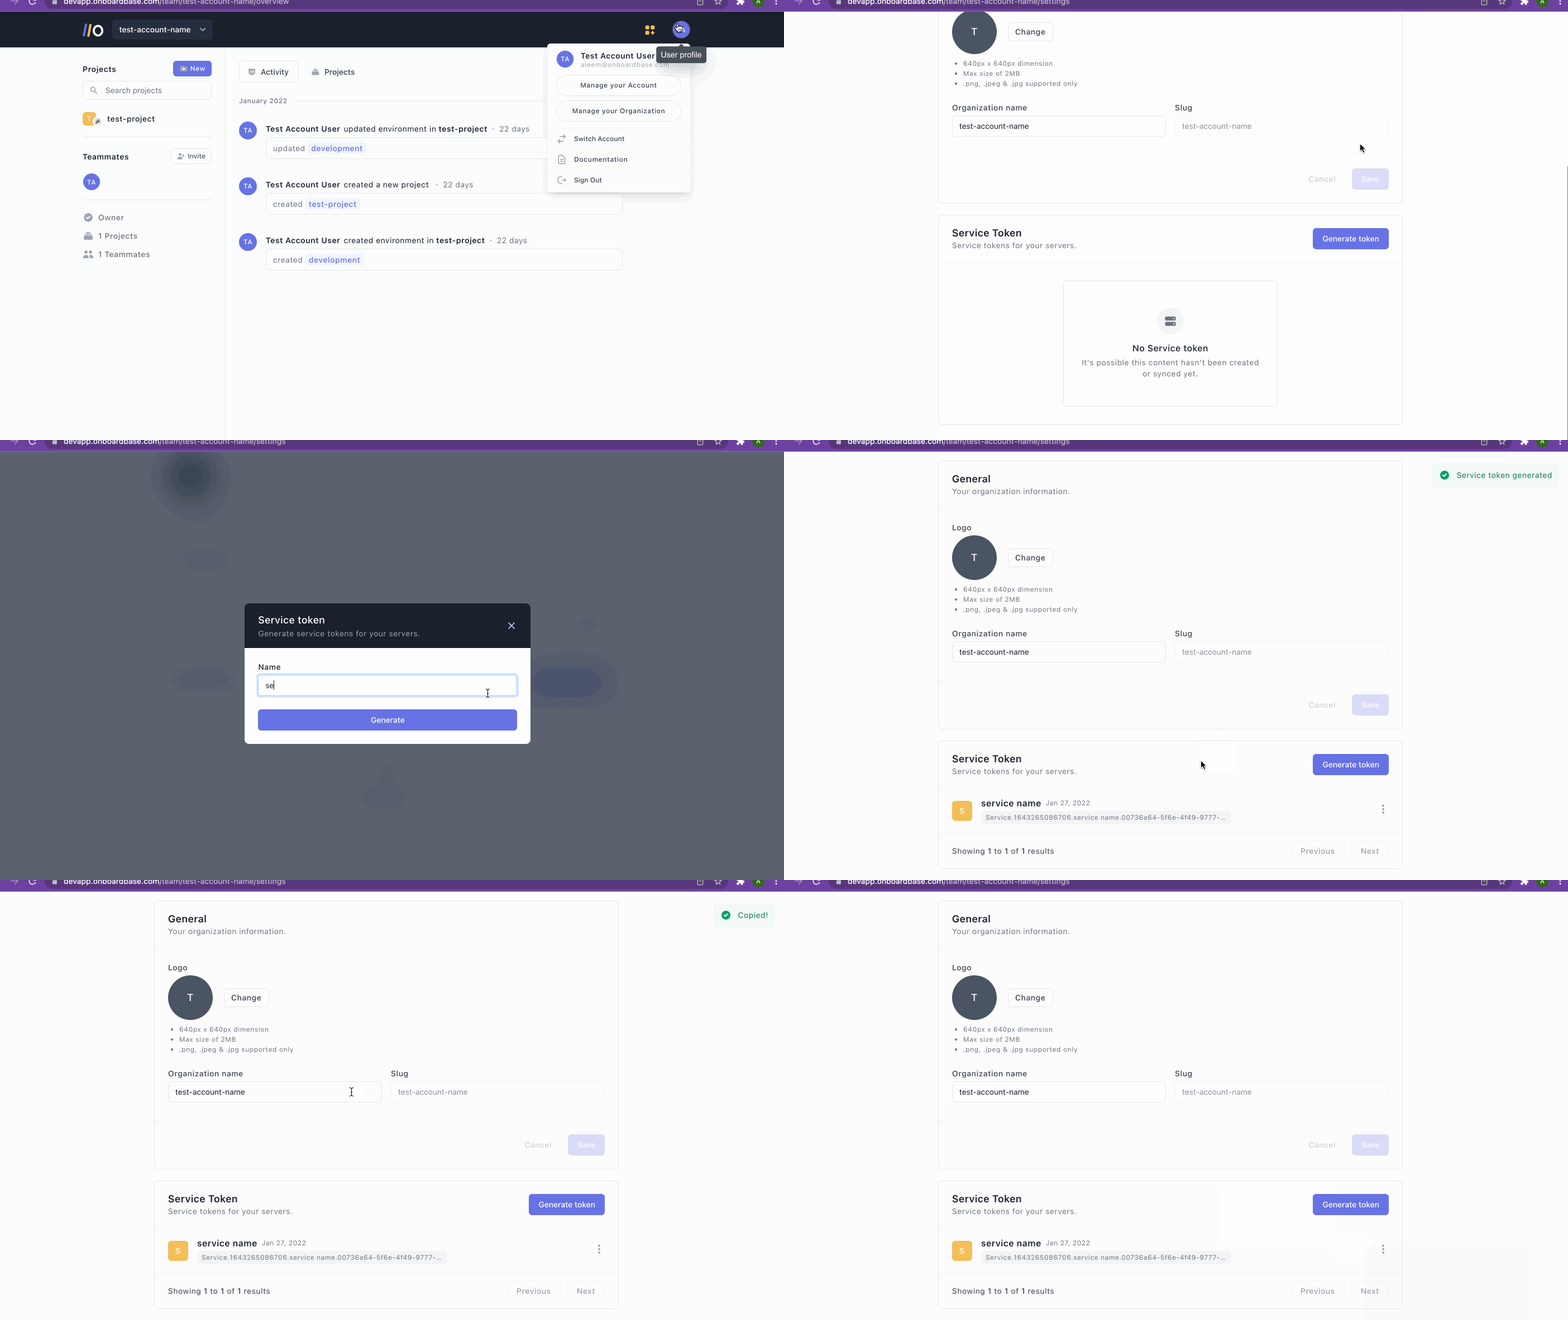
Running the onboardbase login command creates an access token to Onboardbase. This is useful to quickly get developers started and monitor secret usage, but not suitable for a staging or production environment because you don't have access to a web browser to click the confirmation link. Instead, you need to create a Service Token for machine-to-machine authentication:
- Login to your Onboardbase account as an admin
- Click the profile icon in the navbar
- Scroll to the Service Token section
- Click Generate token button
- Enter the name of the service
- Click on Generate to finalize

- Add the service token to your project. First, prevent the token from being logged by running the following command:
export HISTIGNORE='onboardbase*';
Then, run config:set:
onboardbase config:set --token "Service.****.****.*****" --scope /usr/src/app;
2. Build and run
You can now build and run your application with the onboardbase run command like you did in development:
onboardbase run -c "echo $MY_SECRET"
3. Production
The configuration for production is similar to staging, except that you'll need to create a new Onboardbase environment and Service Token for your production environment.
Up next
After deploying to production, you still need to maintain your pipeline, and perhaps onboard new developers to your team.
Updated about 1 year ago
