Express / NodeJS
In this guide, we will discuss how to setup an Express project, that uses Onboardbase to manage its secrets(environment variables)
This guide assumes you already have a project set up in Onboardbase Dashboard. If you don't, please create an account and get started!
In this tutorial, we will show how you can use Onboardbase to manage the environment variables your NodeJs Server Application depends on.
The most popular way of doing this in NodeJs is by creating a .env file in your project code and then using a NodeJs package like dotenv which will load the environment variables into the process.env.
With a setup like this, if multiple people work on a project, they will need to each have a copy of the .env file, and they must all be aware of updates made by any member of the team and update their local .env files.
This becomes more difficult as the number of people working on the project increases. And since applications are going to run in different environments that require different environment variables throughout their life cycle - development, staging, or production environment, each environment must use the right environment variables. It will be disastrous if the production application uses the development environment variables.
Onboardbase is an all-in-one SecretOps infrastructure for securing environment configs/secret credentials across all stages, from development to production. It's designed for modern dev teams with rapidly changing requirements in collaborative environments.
Let's see how we can use Onboardbase to manage the environment variables for a NodeJs application. We will create a very simple NodeJs Express application for the purpose of this tutorial
1. Install the Onboardbase CLI
npm i -g @onboardbase/cli@latest
You can confirm the installation is successful by running onboardbase --version to output the version of the CLI you just installed.
2. In development: login
In your project folder, run the login command:
`onboardbase login`
Open the authorization page in your browser and enter your email. A confirmation link will be sent to the email. Click the link, and your CLI should be authorized. Check your terminal to confirm.
3. In production: use a service token
Running the onboardbase login command creates an access token to Onboardbase. This is useful to quickly get developers started and monitor secret usage, but not suitable for a production environment. Instead, you need to create a Service Token for machine-to-machine authentication.
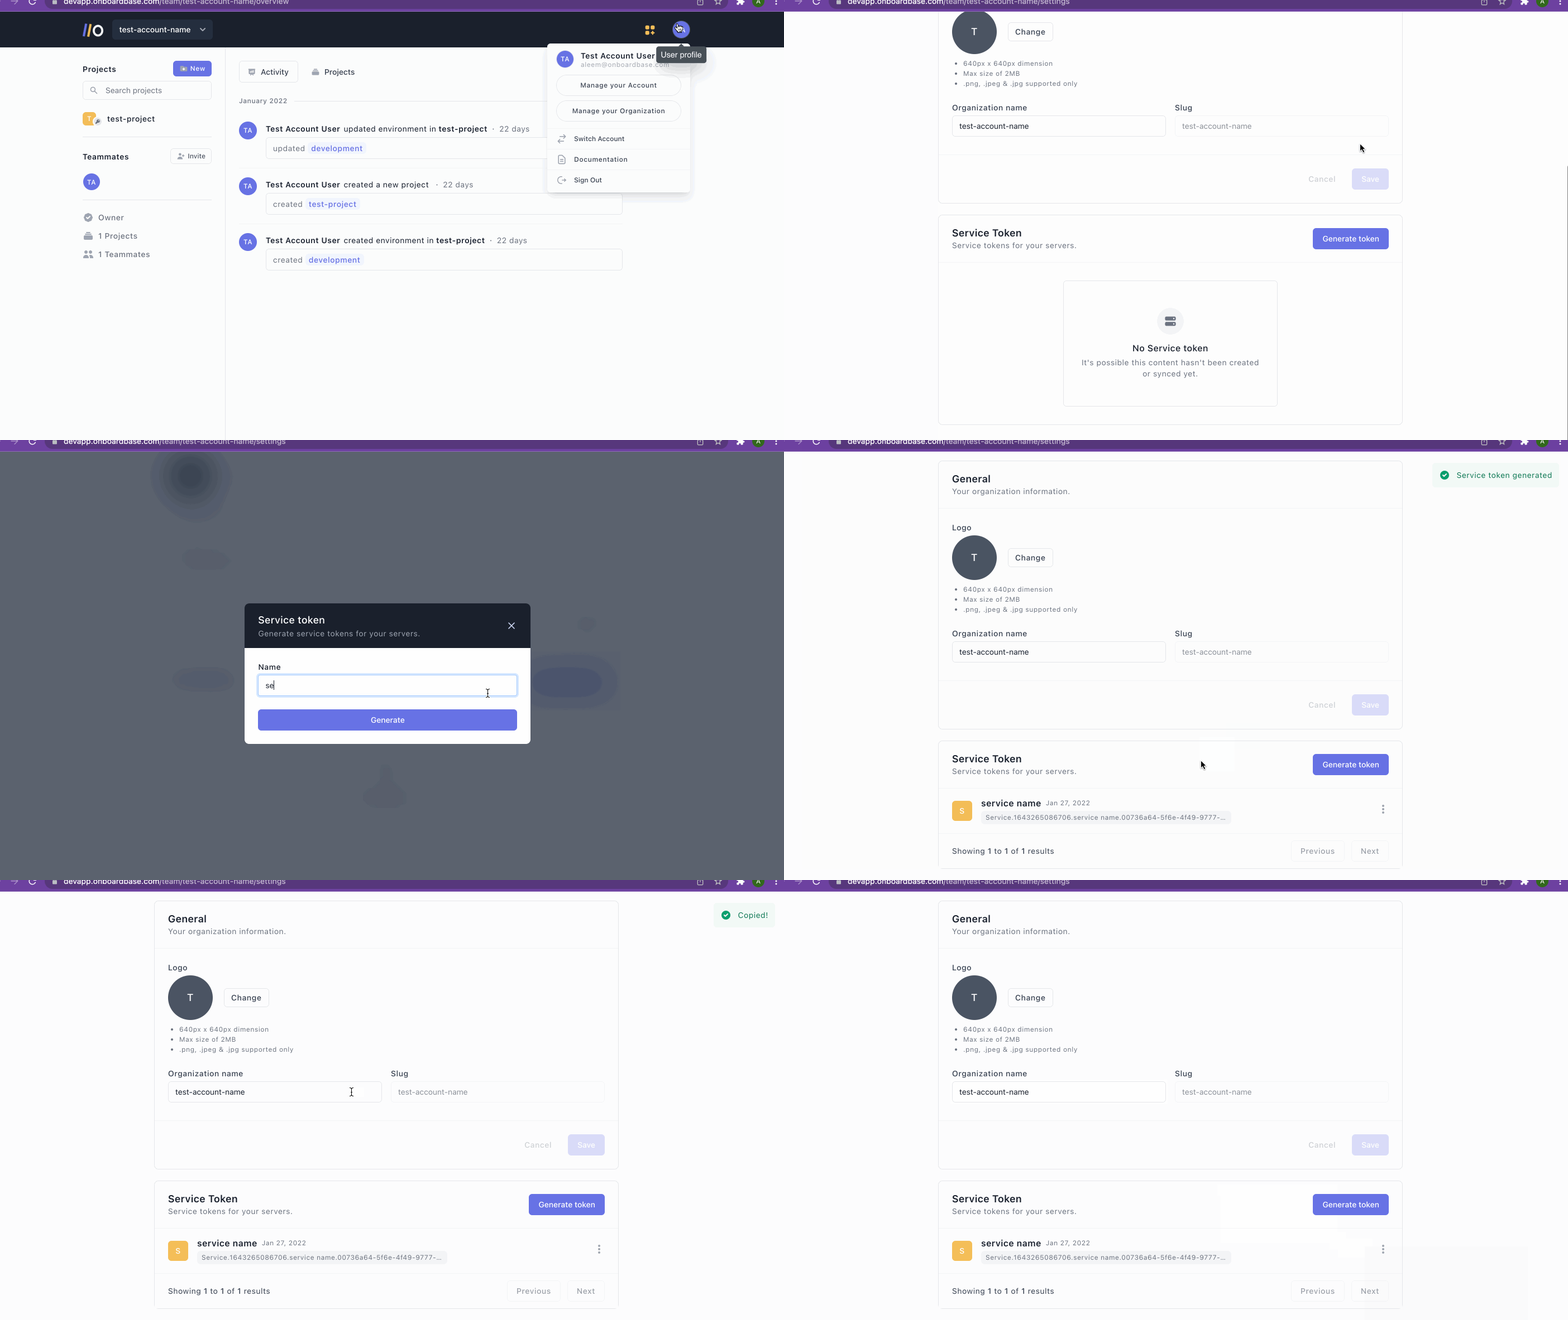
1. Create a service token from the web dashboard
- Login to your Onboardbase account as an admin
- Click the profile icon in the navbar
- Scroll to the Service Token section
- Click Generate token button
- Enter the name of the service
- Click on Generate to finalize

2. Add the service token to your NodeJS project
A service token contains sensitive information.
Leaking your service token gives access to your other secrets, so make sure to use it wisely and never store it in your git history or server logs.
This method persists the service token in the configuration settings, so it's useful in server and VM environments to prevent re-authenticating the CLI on every restart.
- Prevent the service token from being leaked in the bash log history:
export HISTIGNORE='onboardbase*'
- Define the service token in the configuration settings:
onboardbase config:set --token "Service.****.****.*****" --scope /usr/src/app
4. Setup
Run the setup command to create a configuration file containing your project name and your desired environment:
onboardbase setup
5. Run your project
Onboardbase injects environment variables at runtime using the onboardbase run command.
All you have to do is to encapsulate your scripts with onboardbase run in your package.json file:
"scripts": {
    "dev": "onboardbase run -c \"nodemon server.js\"",
    "start": "onboardbase run -c \"pm2 start server.js\""
}
You can then simply start your development server as usual:
npm run dev
Updated over 1 year ago
