Authentication
All about auth management with Onboardbase
At Onboardbase, security is at the core of what we built and how we interact with third-party services. In this document, we will share the details about how we handle authentication and authorization to ensure enough transparency and help experts analyze our implementations and approaches.
There are three main ways to authenticate with Onboardbase:
- Via the web app using your email
- Via CLI with Device or Service tokens
- Via API keys
- Via OAuth token
1. Dashboard account
Onboardbase web app can be accessed with a registered email through email confirmation. We don't support the email/password authentication model because we know that passwords can be compromised, and some users might use weak passwords.
With emails / password-less flow, users have to visit a link that we send to them, which would give them secure access to their secrets via the web browser.
2. API Keys
Onboardbase secrets can be accessed via the API, which is secured via an API Key that can be generated from the account settings section using the web app.
API Keys are generated with a passcode, then used for secured and encrypted communication between the client calling the API and the server. Secrets retrieved via API Keys are decrypted using the AES algorithm with the passphrase of the API Key as the AES Key.
3. CLI
Device tokens
Onboardbase CLI is authenticated with a mechanism called device token. A device token is a unique token generated for any account attached to the CLI.
Device Tokens are tokens created when you log in to the Onboardbase Cli via the web browser. Device tokens have a scoped authentication mechanism system which can be broken down into scoped authentication and global authentication.
The device token authentication process follows the account login process, which generates RSA Keys for secure and encrypted communication between the CLI client and the Onboardbase server.
To access the Onboardbase CLI, run the command onboardbase login on your terminal:
onboardbase loginYou'll be prompted to login via web browser:
? Open the authorization page in your browser? (Use arrow keys)
❯ Yes
  No
Scoped Authentication: enables you to authenticate your Onboardbase CLI from a folder or directory that has already been scoped.
Global Authentication: enables you to access projects on Onboardbase that have not been scoped.
Service tokens
Service tokens are the preferred choice for cloud services where it is impossible to follow the CLI login process. Service Tokens are tokens that allow you to authenticate the Onboardbase CLI without using a web browser. The video below summarizes how you can create service tokens.
This token also has similar security and encryption features as the device tokens. The major difference is that Device tokens are generated via a CLI while the Service tokens are generated via the web app.
A Token is a piece of code that allows you access to a restricted resource on the internet. An example of this; can be when we use google authentication codes to gain access to a feature and carry out certain functions of that feature within that application. P2P apps, crypto apps, etc.
At Onboardbase, we have two types of tokens, and in this tutorial, I will show you their differences, uses, and best practices.
Differences between service token and device token
| Service Tokens | Device tokens |
|---|---|
| Only admins can create service tokens. | Anyone can create device tokens. |
| Service tokens do not require you to access a web browser | Device tokens require you to access a web browser. |
| Using a service token for the CLI is faster because you do not have to open a browser, input your login email, wait for the email, etc., which are all required steps for device tokens. | Using a device token for the CLI is slower because you have to open a browser, input your login email, and wait for the email. |
Use case of a Service Tokens
An automated process that does not need to access the browser, e.g., configuring NPM to your GitHub action pipeline. Think of service tokens as API keys that exist in your server that are used to access the resources of a provider.
In a nutshell, In an environment where you do not have access to a browser and want to use the CLI, a service token will be used, for example, automating fetching secrets in a pipeline.
Use cases of Device Tokens
Non-Automated processes will always require a browser to authenticate.
4. OAuth
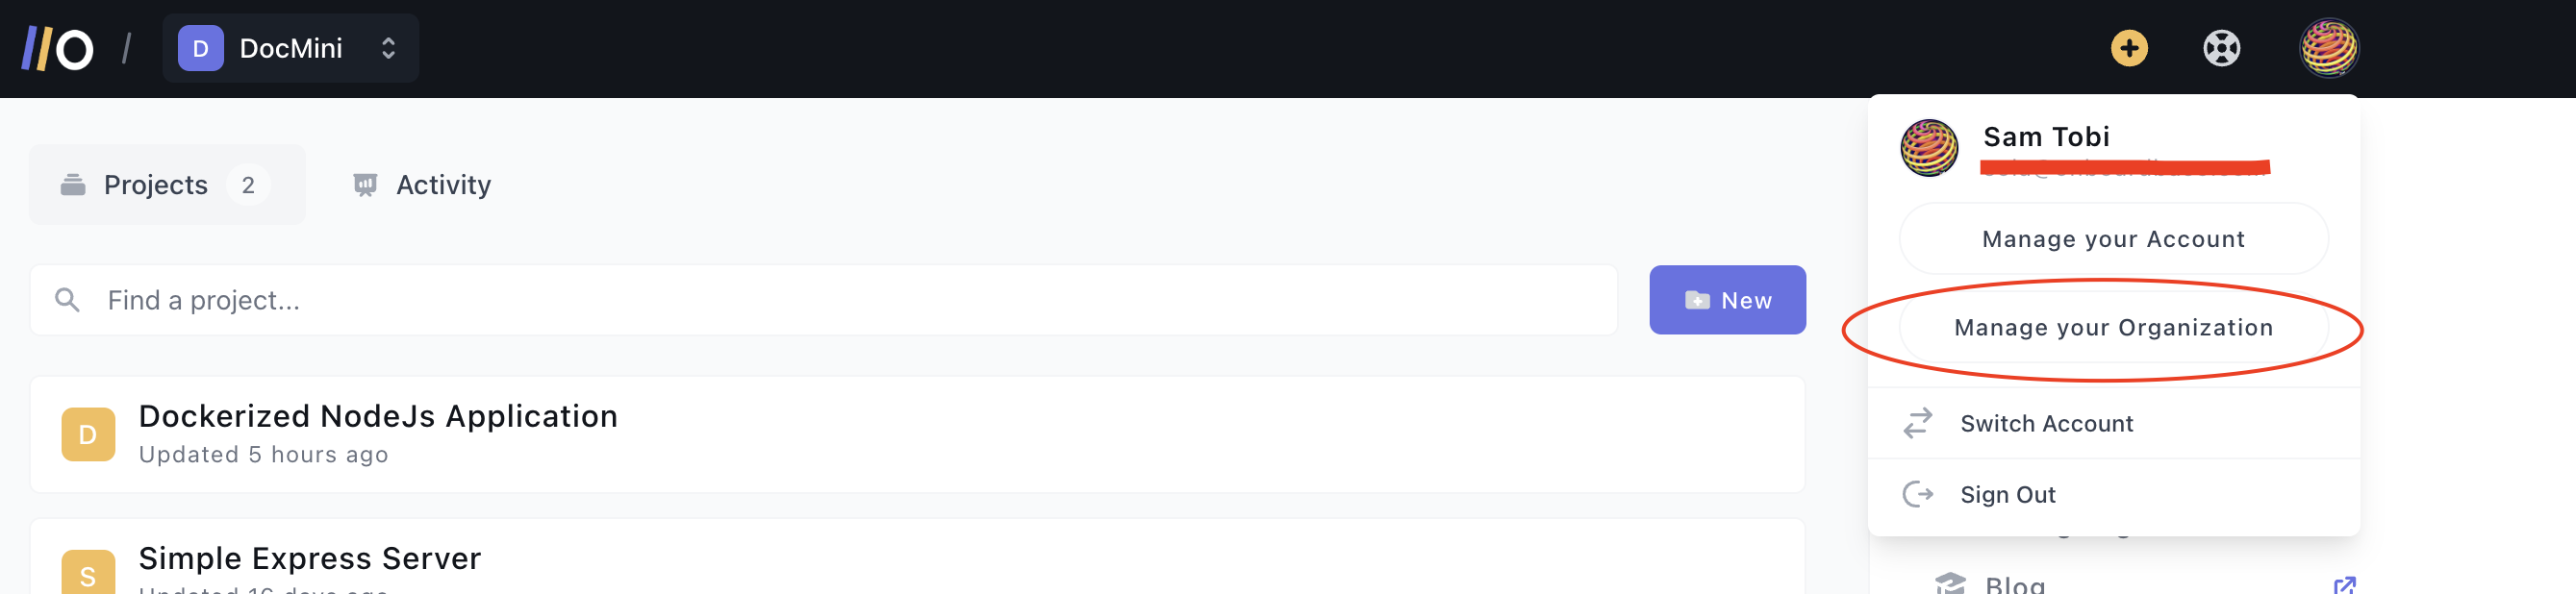
To set up an Onboardbase OAuth Application, you begin by signing into your Onboardbase account. After signing in, click on your profile icon at the top right corner. Then click on Manage Your Organization
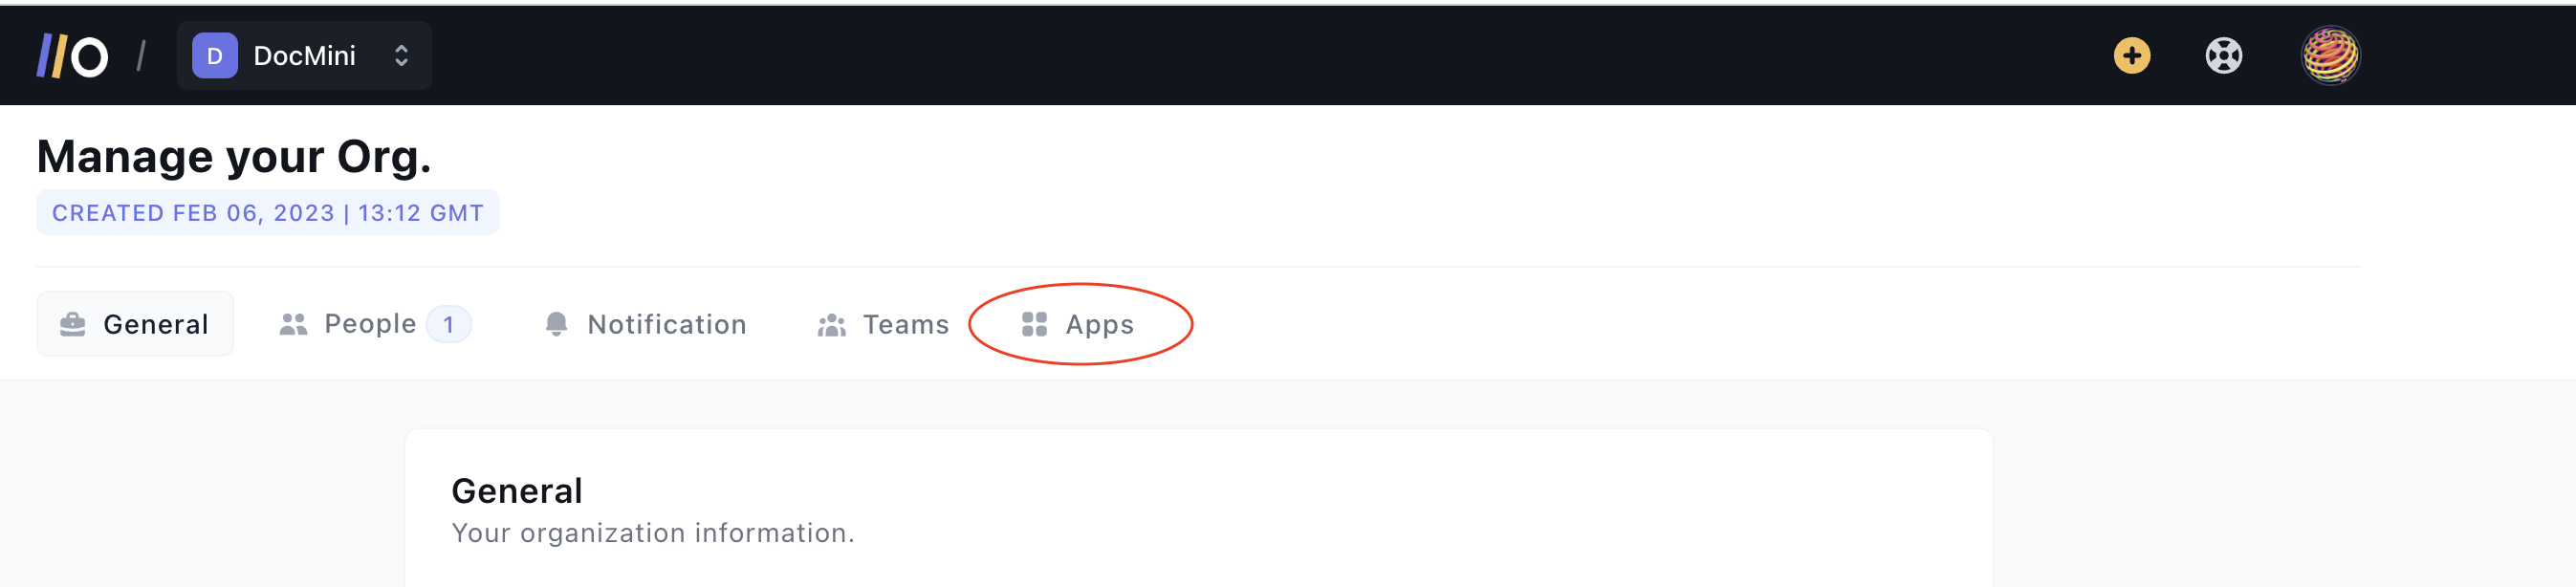
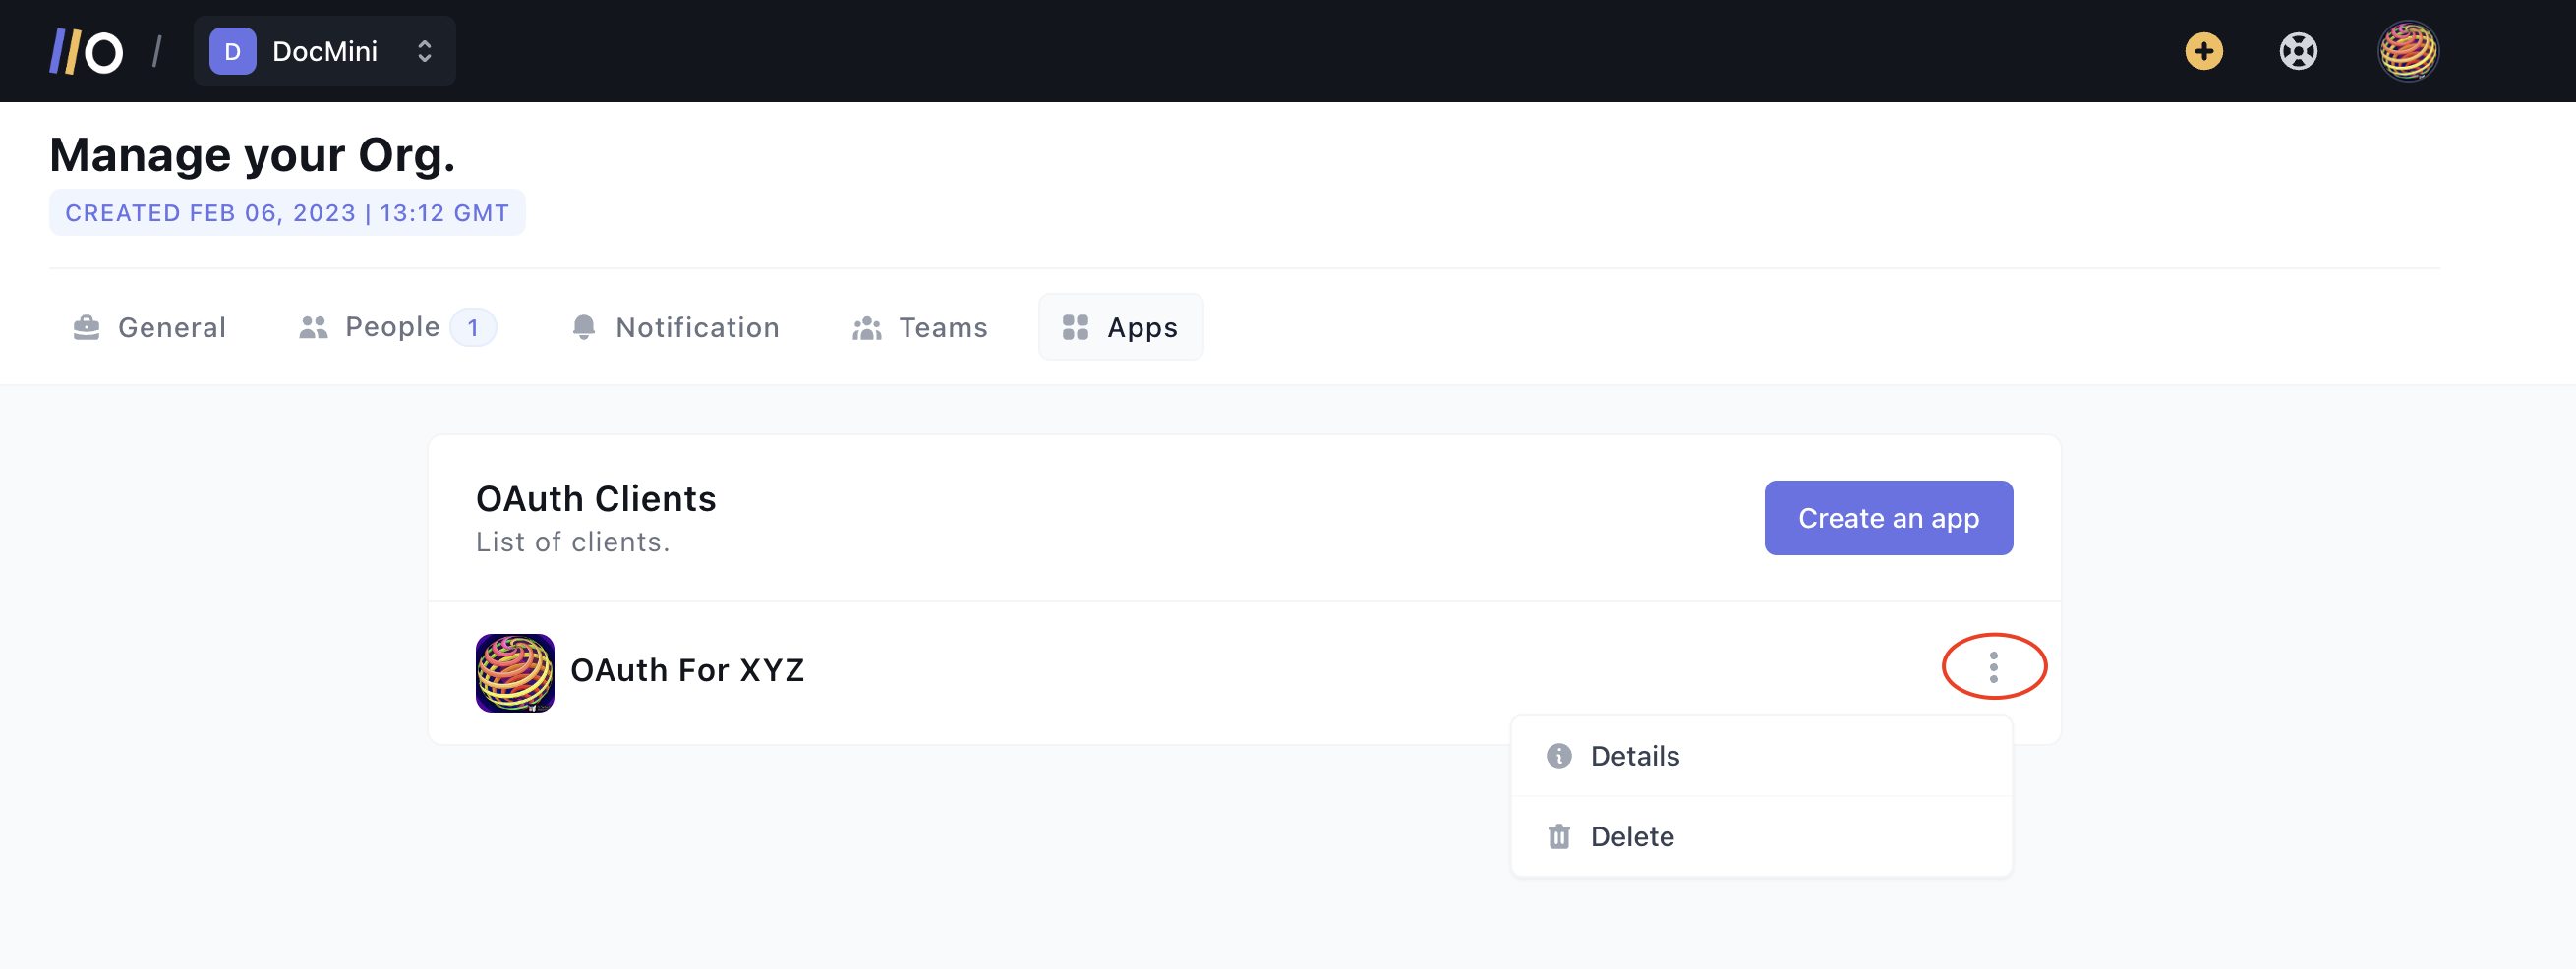
On the Organization Settings page, select Apps from the tabs displayed
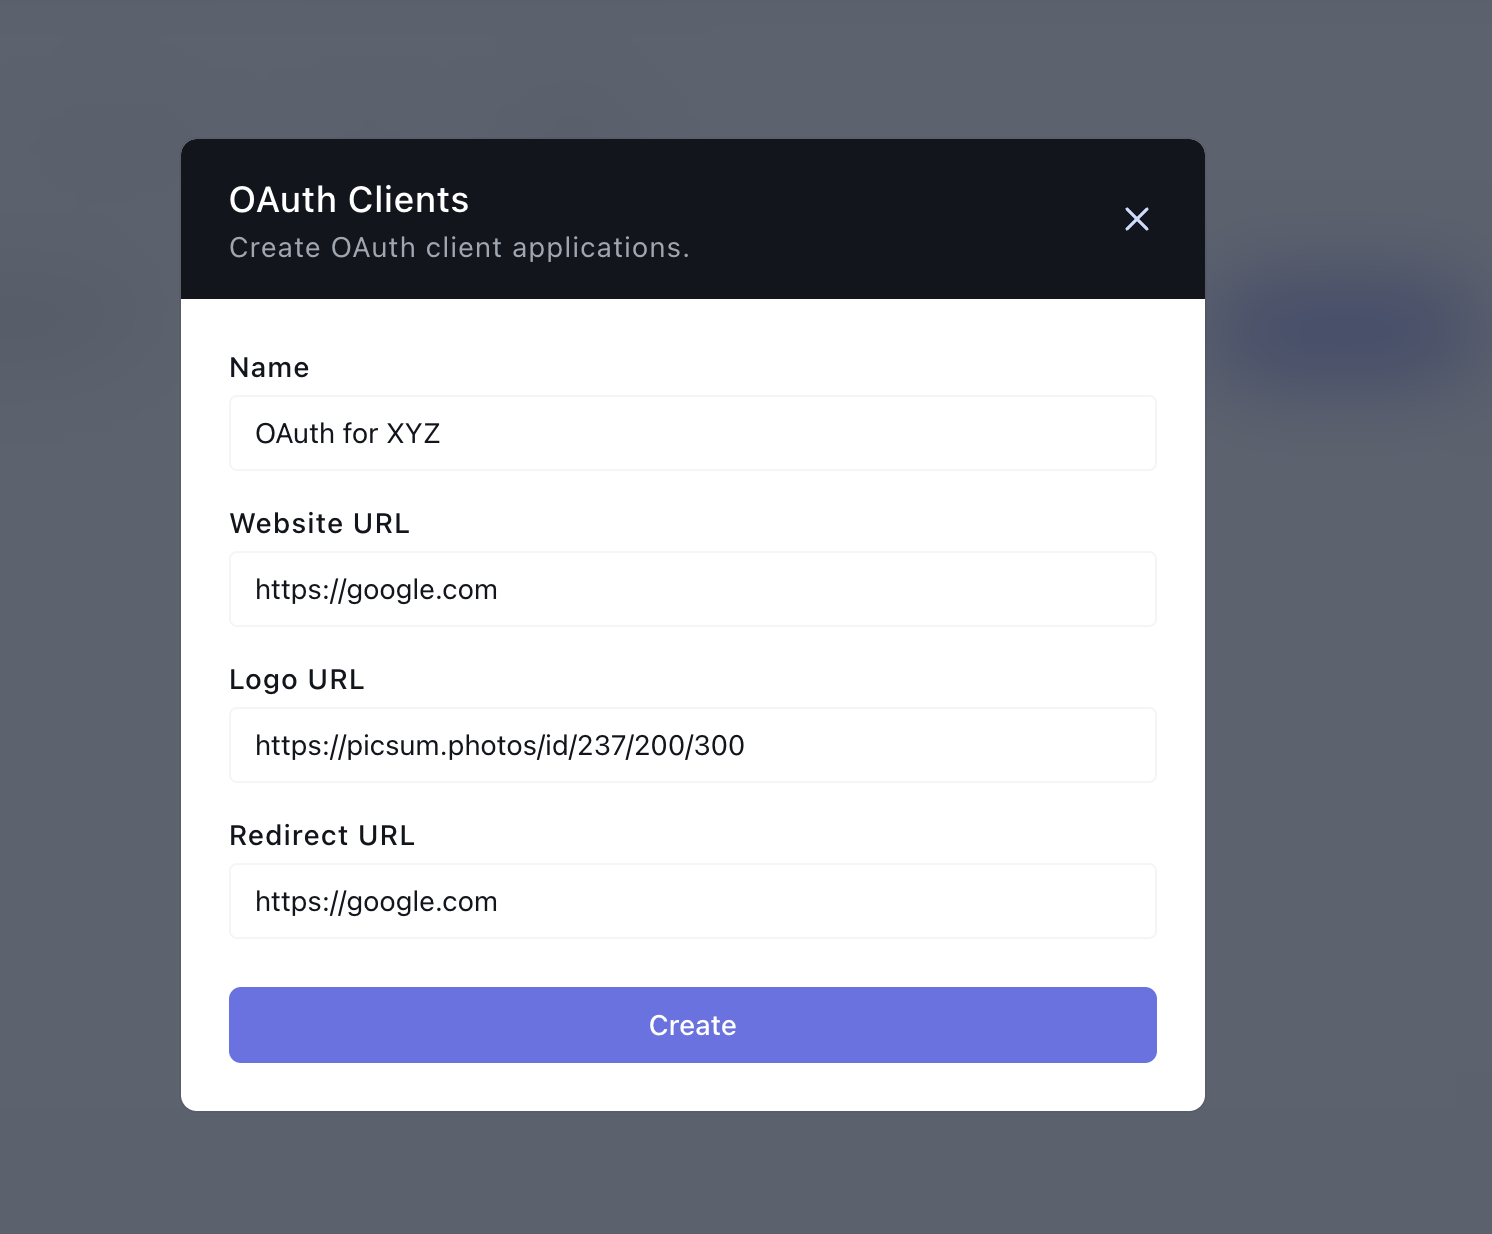
On the new screen, click on Create an App. This will launch a modal where you can supply the details of the OAuth Application you want to create.
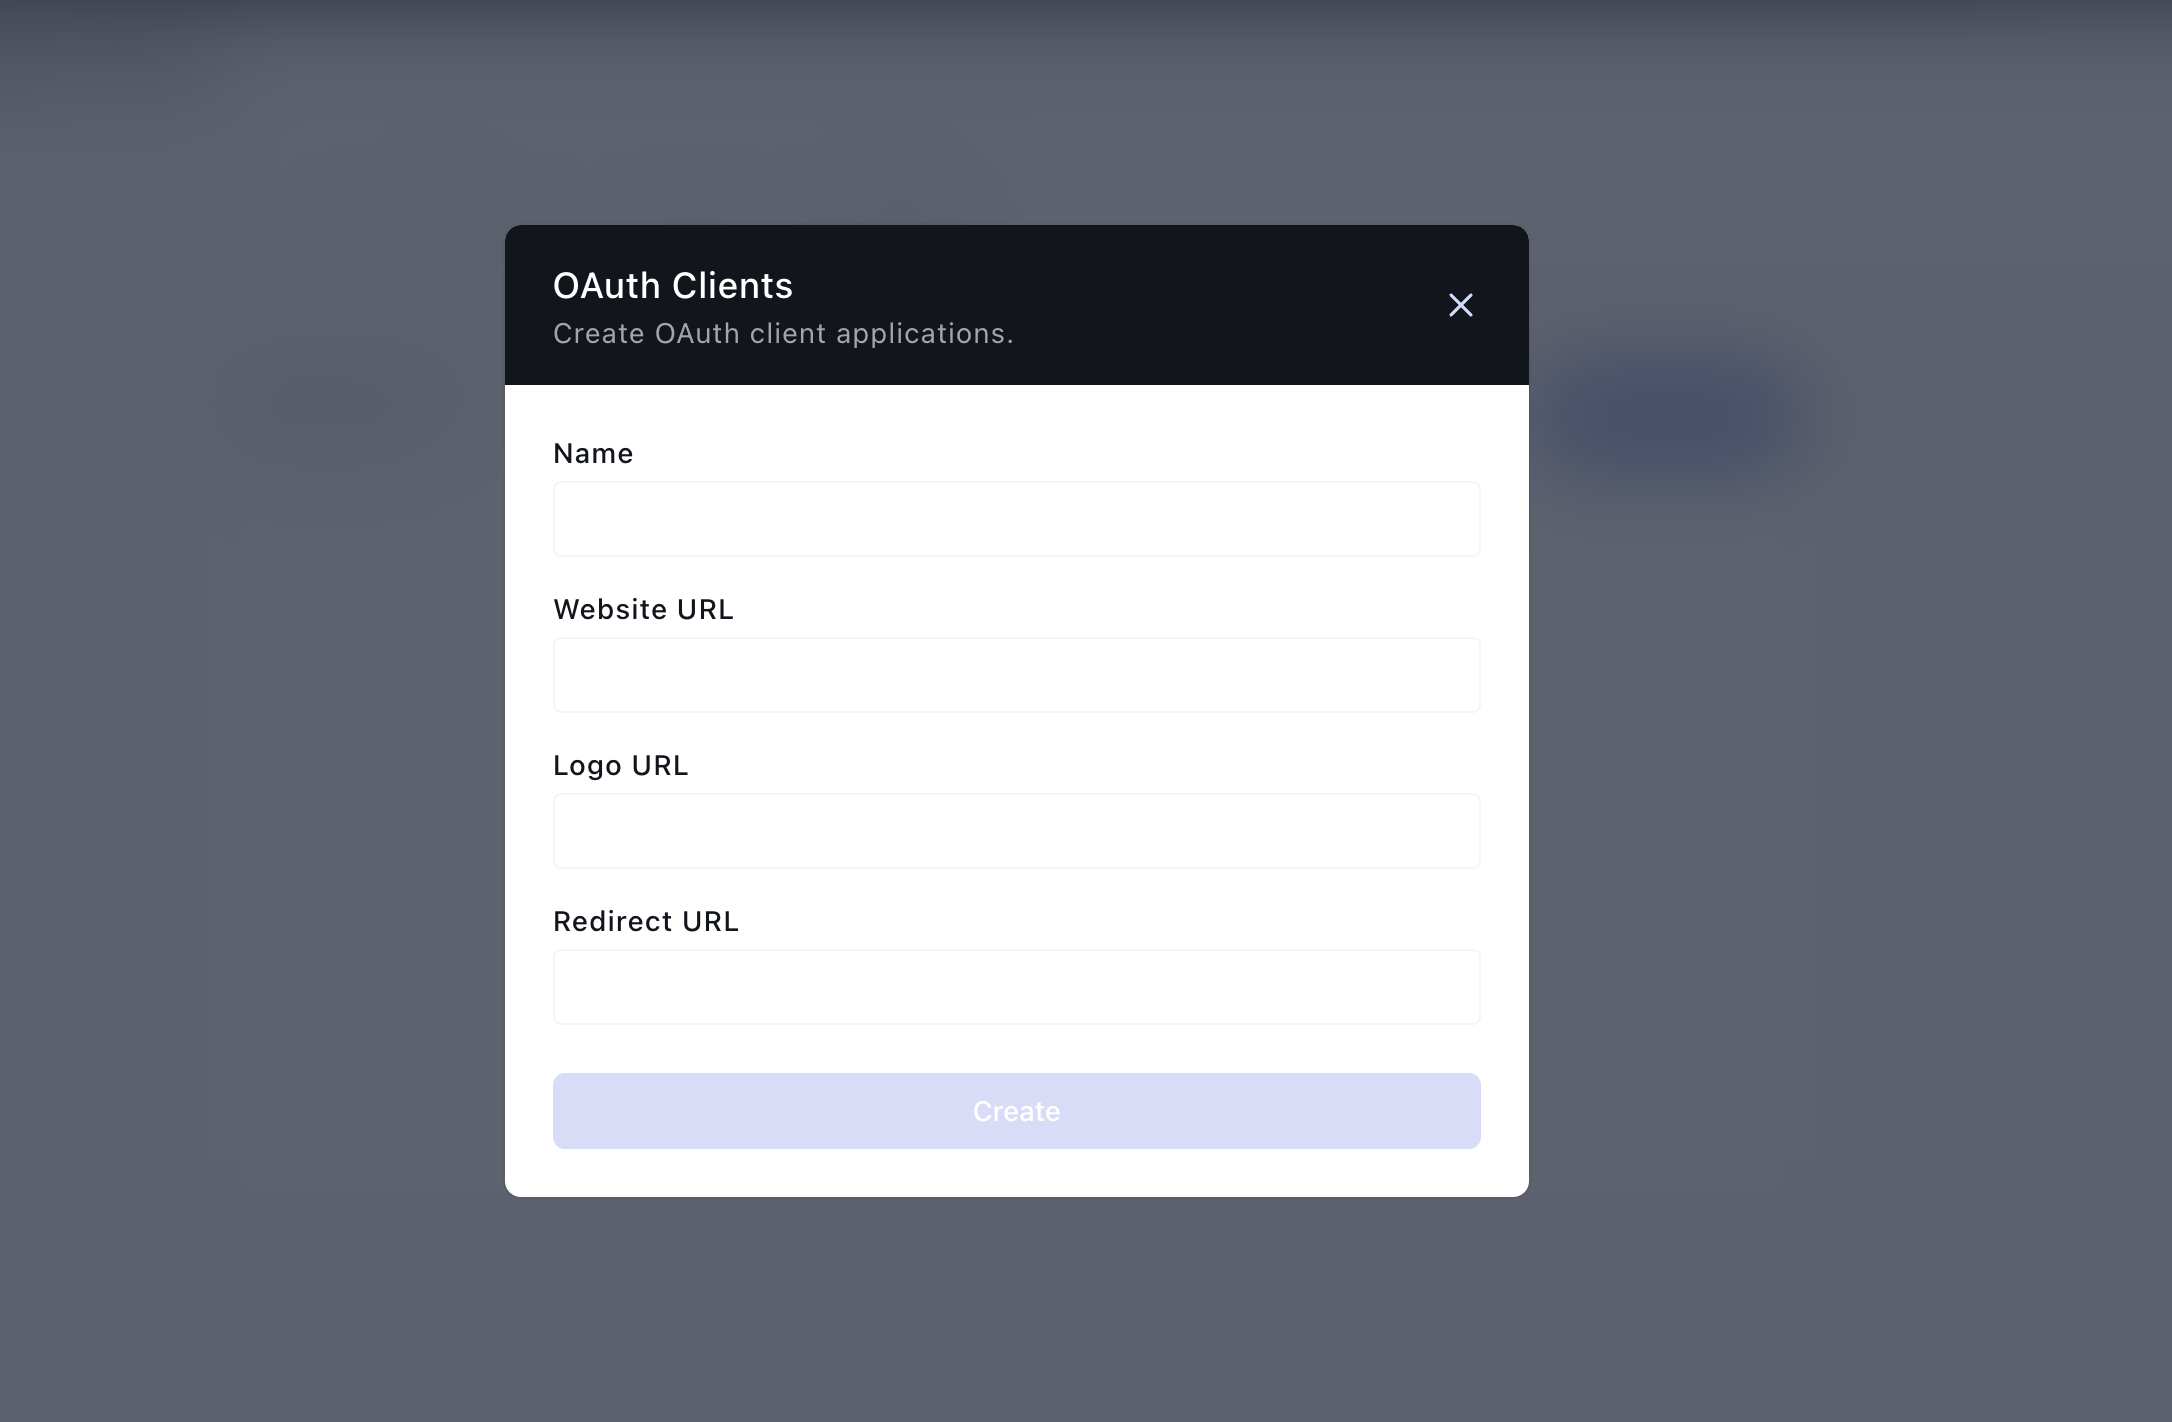
Here are explanations for the form fields:
- Name: The name of the OAuth App you want to create
- Website URL: The URL to your website where you want to integrate OAuth
- Logo URL: A public link to your website/business logo
- Redirect URL: The link to the page on your website you want users to be redirected to after completing the OAuth flow
After providing the information, click on Create to create a new OAuth App. This should create a new OAuth App.
Here is an example, we are using https://google.com as an example here. You should use your company website
Generating an Authorization Code Link
On the Apps list, click on the 'kebab' (three vertical dots) at the right of the OAuth app. This should show a drop-down. Click on Details on the drop-down:
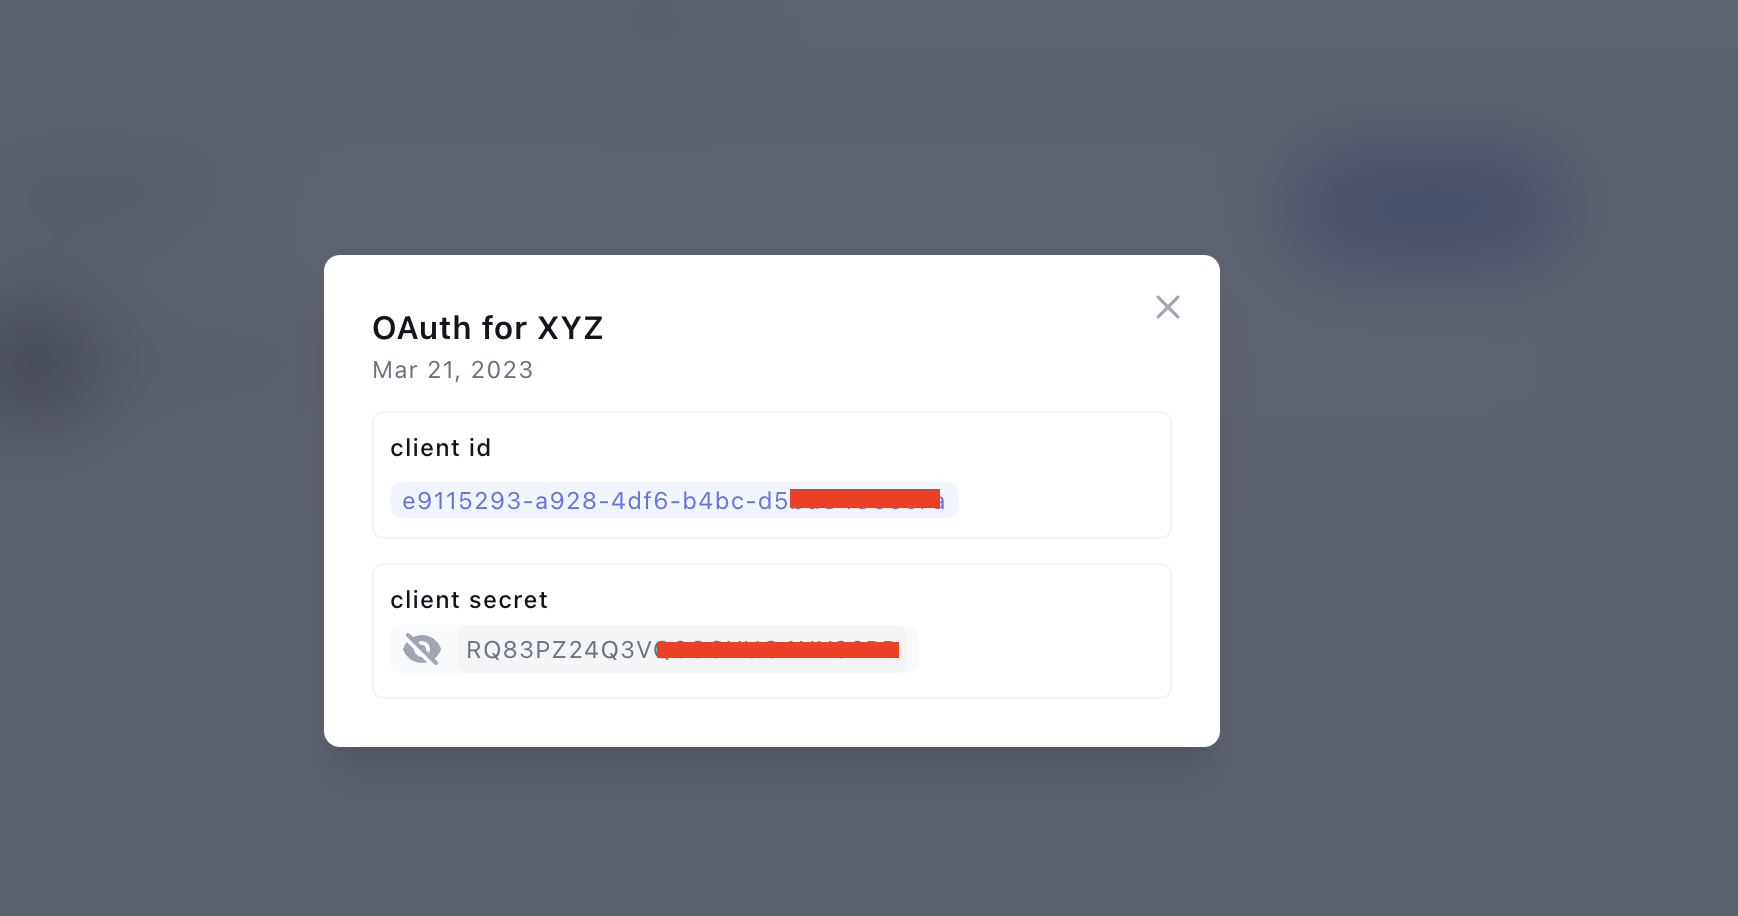
On the details page, reveal the Client's Secret, copy it, and the client ID:
Construct an Authorization Link in the following form: https://app.onboardbase.com/oauth/authorize?response_type=code&client_id=CLIENT_ID&redirect_uri=REDIRECT_URI&scopes='read.secrets,read.projects'&state="{"hi":"there"}"
Here is an explanation of the parts of the Authorization Link:
- https://app.onboardbase.com/oauth/authorize: the base authorization URL; this is where the client will be directed in order to interact with your OAuth application
- client_id: (Required) The client id from the OAuth Application you created
- redirect_uri: (Required) The redirect URL entered when creating the OAuth Application. An
invalid_credentialserror will be thrown if the redirect_uri entered here does not match the one used in step one above to create the app. Check the errors section for more details. - response_type=code: (Required) Specifies that your application is requesting an authorization code grant
- scopes: (Required) Specifies the level of access that the application is requesting. Check the scopes section for possible scopes. The scopes should be supplied as strings separated by commas (,)
- state: (Optional) Following the OAuth standard, you can provide state parameters. Read more about them here Preventing OAuth Attacks with State Variables
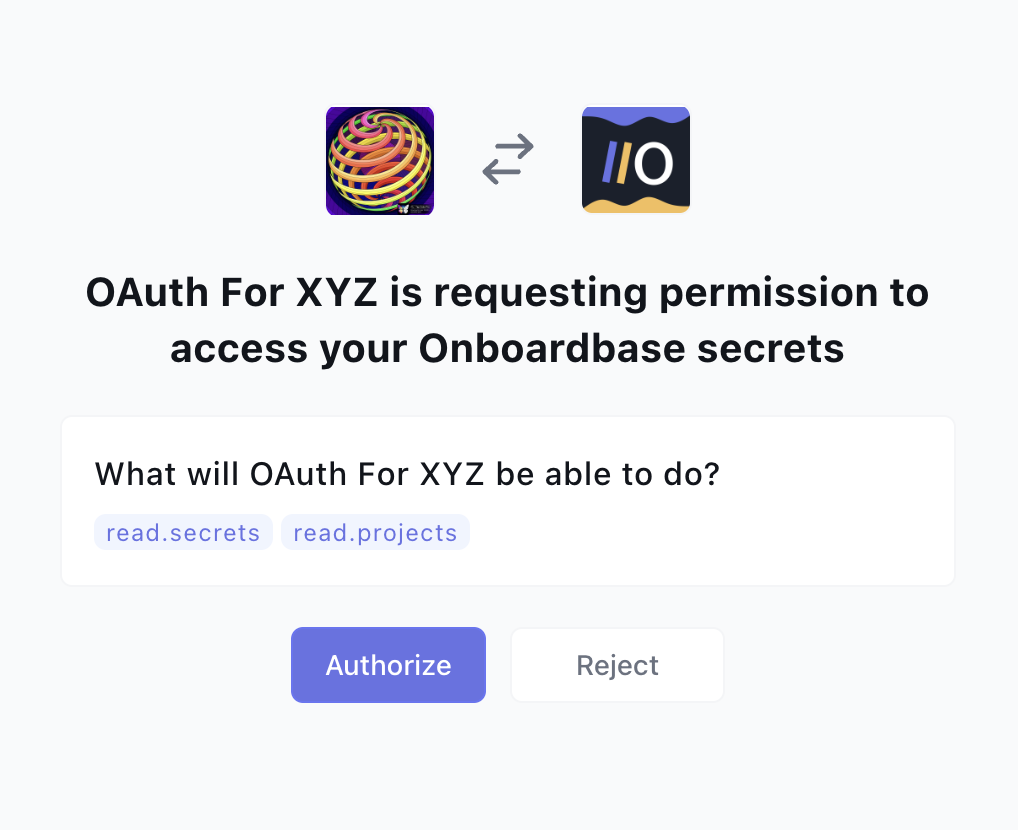
User Authorization
When the link is clicked by the user, the user must first log in to Onboardbase to authenticate their identity unless they are logged in already. Then they will be prompted to authorize or deny the application. Below is an example of that:
Handling Authorization
If the user clicks on “Authorize,” the user will be redirected to the specified redirect_uri for the application, along with an authorization code and state if specified. An example is as follows:
# redirect_uri was set to  https://google.com
https://google.com/callback?code=auth_code”
If the user rejects the authorization, the user will be redirected to the specified redirect_uri but with an error, parameter attached, and state. (See the error section for more details about the errors.)
# redirect_uri was set to  https://google.com
https://www.google.com/?error=access_denied
Requesting for an Access API Key With an Auth Code
When a user successfully authorizes the OAuth and they are issued an authorization code, you can use to authorization code to request an API Key (and an API Key Passphrase).
You will need to construct a URL in this format:
https://api.onboardbase.com/oauth/token?client_id=CLIENT_ID&client_secret=CLIENT_SECRET&grant_type=authorization_code&code=AUTH_CODE&redirect_uri=REDIRECT_URI- client_id: Is the ID of the OAuth Application
- client_secret: The secret of the OAuth Application
- code: Should be set to the auth code from a successful OAuth Authorization
- redirect_uri: Must be assigned to the redirect URL you supplied when creating the OAuth application.
After constructing the URL, make a post request to it. You should receive a success 201 Created response if the request was successful. Here is a sample success response
{
	"data": {
		"api_key": "HYNC7RYK6CK9YPB4WEFUJ9",
		"expires_in": 1680011776,
		"scopes": [
			"read.secrets",
			"read.projects"
		],
		"token_type": "bearer",
		"passphrase": "KNHRYpG6q"
	},
	"errors": []
}
If an error occurs, you will get an error response with the errors in the errors field. Here is a sample failure response:
{
	"data": null,
	"errors": [
		{
			"message": "auth_code_expired",
			"code": 1800
		}
	]
}
Scopes
Here are the examples of Scopes that can be supplied:
- Secrets:
manage.secrets,read.secrets,create.secrets,update.secrets,delete.secrets' - Projects:
manage.projects,read.projects,create.projects,update.projects,delete.projects' - Teams:
manage.teams,read.teams,create.teams,update.teams,delete.teams'
For every resource, the manage.resource_name gives all permissions to the Generated API key, e.g., the API Key can be used to Create, Read, Update, and Delete the resource if the operations are allowed.
On the other hand, a scope like read.teams only gives the API Key permission to read teams only.
Error Codes
Here are the possible error codes
| Message | Codes |
|---|---|
| invalid_request | 1000 |
| unauthorized_client | 1100 |
| access_denied | 1200 |
| unsupported_response_type | 1300 |
| invalid_scope | 1400 |
| server_error | 1500 |
| temporarily_unavailable | 1600 |
| invalid_code | 1700 |
| auth_code_expired | 1800 |