Integrating with Onboardbase OAuth
In this tutorial, we show how you can integrate Onboardbase OAuth into your authentication flow
OAuth is a free authorization protocol. By integrating with Onboardbase OAuth, users can grant permission for third parties application to some resources on their Onboardbase account.
This tutorial will walk through a small Full Stack application in Next.js that enables users to authorize the application via our OAuth integration. After authorization, we will then be listing all of the Onboardbase Projects that a user has.
This sample project requires a frontend and a backend. The frontend will be used by the users to initiate the OAuth flow. When the users are returned to the redirect URL configured for the OAuth, the frontend needs to pick the authorization code Onboardbase attaches to the redirect URL and send it to the backend to complete the rest of the integration.
We will be following our guide on OAuth here. The possible actions that can be taken are those exposed via our public API.
The sample project for this tutorial can be cloned from here:
https://github.com/Onboardbase/tutorial-oauth-integration.git
The project is deployed on Vercel at https://tutorial-oauth-integration.vercel.app/. We need a public URL for the project in order to set up a redirect URL for the OAuth application we will be creating shortly.
Creating the OAuth Application on Onboardbase
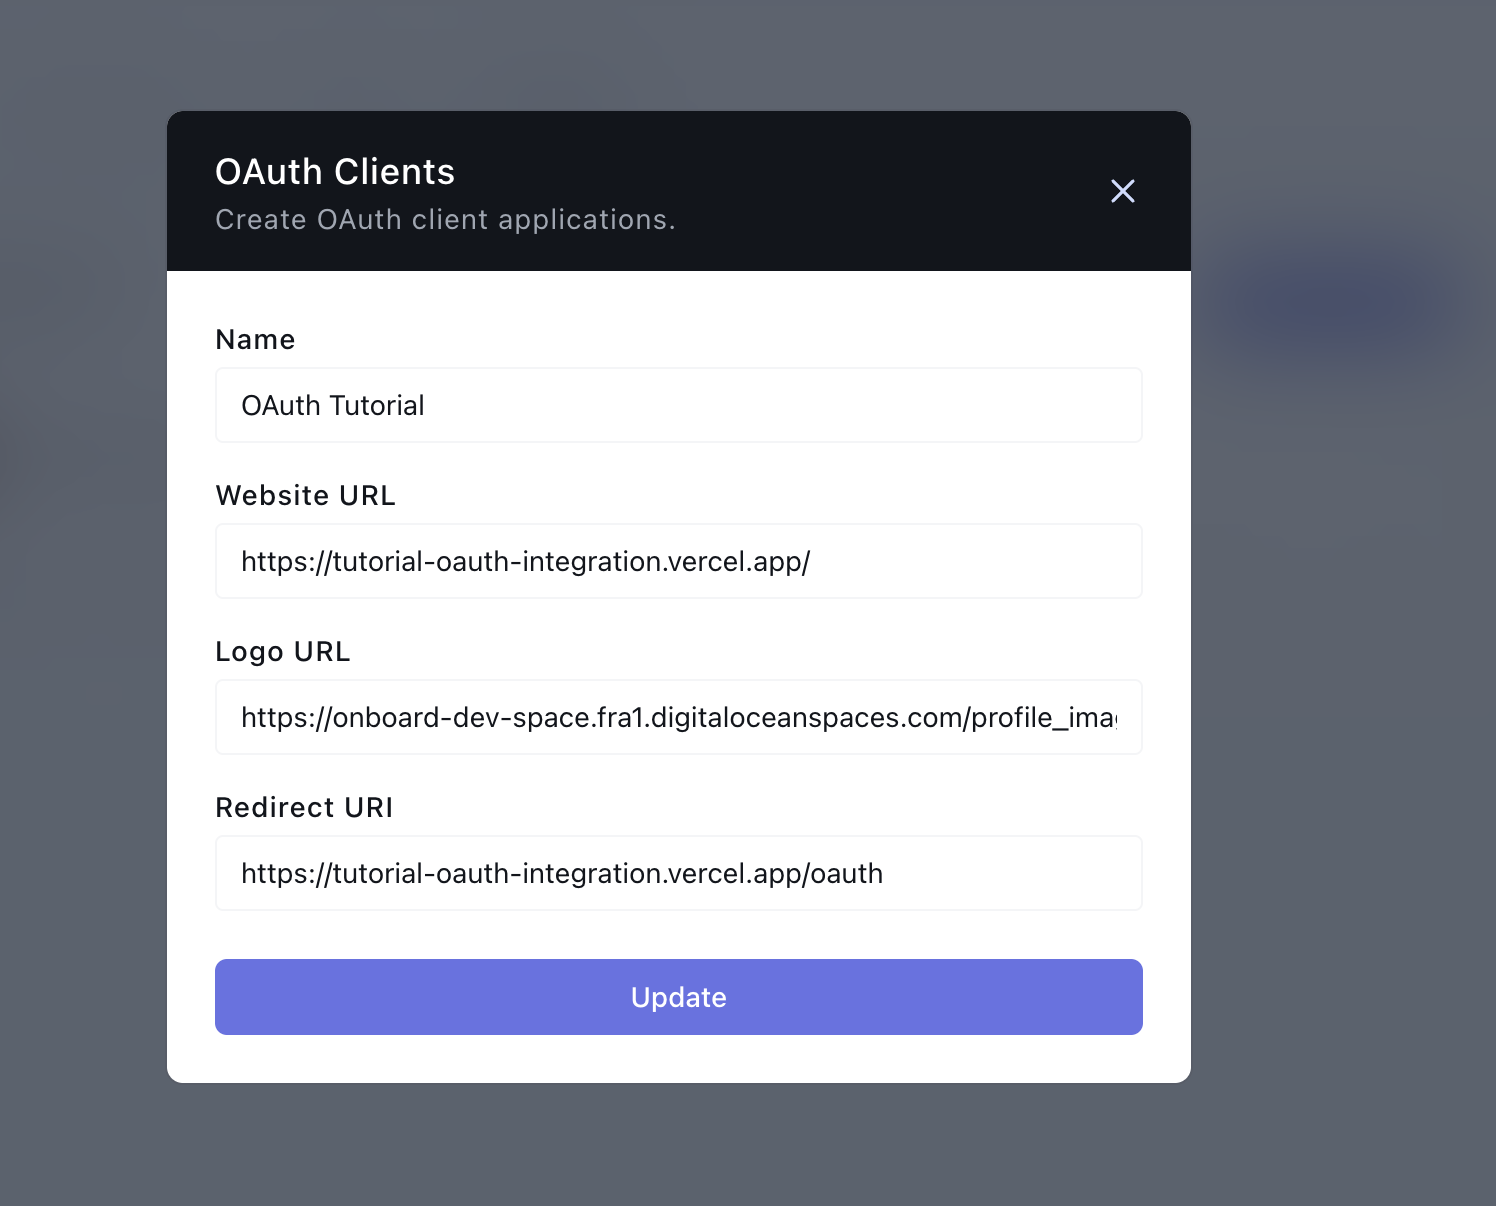
Following the guide here, we will create an OAuth application on Onboardbase from the Manage your organization page. The OAuth application has the following details:

Note the Redirect URI, its value is the URL of the page we want the user to land after completing the OAuth process; it will be a page on your website. For this tutorial, it is set to `https://tutorial-oauth-integration.vercel.app/oauth
Setting up Vercel Integration for the Sample Project
Since our sample project is in Next.js, we will use our Vercel Integration to handle environment variables. You can skip this section if you are not working with Next.js.
In the sample project source code, inside of the file utils/helper.js we make use of three environment variables:
...
export const config = {
  obb: {
    clientId: process.env.OBB_CLIENT_ID,
    clientSecret: process.env.OBB_CLIENT_SECRET,
    redirectUrl: process.env.OBB_REDIRECT_URL,
  },
};
...
We will create an Onboardbase Project to store these environment variables. Then we will have to use our Vercel Integration to allow Onboardbase to inject those variables when the project is started on Vercel.
After setting up the Onboardbase CLI, we can start the project with onboardbase run "yarn dev"
Frontend Integration: Getting Onboardbase OAuth Authorization URL
From the OAuth guide here, we need to construct an authorization URL for the client using the OAuth client ID and redirect URL we provided while creating the OAuth application. Inside of utils/helper.js We have the getOBBOauthUrl function that generates the authorization URL:
export const getOBBOauthUrl = (state) => {
  const { clientId, redirectUrl } = config.obb;
  const scopes = "read.secrets,read.projects";
  return `https://app.onboardbase.com/oauth/authorize?response_type=code&client_id=${clientId}&redirect_uri=${redirectUrl}&scopes='${scopes}'&state='${state}'`;
};
We will be requesting the scopes read.secrets and read.projects on authorization by the user, you can see the list of all the scopes here. Since the sample project is going to list all the projects a user has with Onboardbase, we need to request the read.projects scope.
Inside of pages/index.js we call getOBBOauthUrl function with a string that we will use as an OAuth state. The state is not required. You can read more about it here.
...
	<button style={{ padding: "1rem" }}>
      <Link href={getOBBOauthUrl(`{ "hi": "there" }`)}>
        <p className={inter.className}>Authenticate with Onboardbase</p>
      </Link>
    </button>
...
Backend Integration: Handling User Authorization
When a user completes the OAuth authorization, they will be redirected to the redirect URL. We will attach a code query to the URL, which will be set to the authorization code; you must use this code to request an API Key from Onboardbase.
Inside of pages/api/projects we have created an API endpoint to receive the auth code and make the request to generate an API Key from the code. We have an handler function that handles the incoming request:
export default async function handler(req, res) {
  const result = await fetchProjects(req);
  if (result.error) {
    return res.status(500).json({ error: result.error });
  }
  res.status(200).json({ projects: result.projects });
}
The fetchProjects method first performs some validation on the request body to ensure that the authCode body parameter is supplied:
async function fetchProjects(req) {
  const body = req.body;
  const authCode = body.authCode;
  if (!authCode) {
    return {
      error: "No auth code found",
      projects: [],
    };
  }

  ...
}
After getting the auth code, we will then use the code to request an access API Key as specified in the guide. We have a function getOAuthTokenAuthURL that takes in the auth code and then uses constructs the URL we need to make a request to exchange the auth code for an API Key:
function getOAuthTokenAuthURL(authCode) {
  const { clientId, clientSecret, redirectUrl } = config.obb;
  const postURl = `https://api.onboardbase.com/oauth/token?client_id=${clientId}&client_secret=${clientSecret}&grant_type=authorization_code&code=${authCode}&redirect_uri=${redirectUrl}
`;
  return postURl;
}
We need to attach the client ID and secret, the auth code, and the redirect URL from the OAuth application we created on Onboardbase earlier. We are doing this on the sample project backend API, so we don't need to worry about the client's secret being exposed.
Requesting for an API Key
After constructing the URL, we need to send a POST request to it. It doesn't require any request body. The fetchProjects function continues as follows:
async function fetchProjects(req) {
	...
  try {
    const postURl = getOAuthTokenAuthURL(authCode);
    const response = await fetch(postURl, {
      method: "POST",
      headers: {
        "Content-Type": "application/json",
        "Access-Control-Allow-Credentials": true,
      },
    });
    const getAuthResult = await response.json();
    const apiKey = getAuthResult?.data?.api_key;
    if (!apiKey) {
      return {
        error: "No API key found",
        projects: [],
      };
    }
...
  }
We pick the API Key from the request result, check if there wasn't an apiKey, and return an error in that case.
If there is an API Key, it is advised that you save the API Key and attach it to the user, but for this sample project, we will skip that to keep this tutorial short.
Making Request to Onboardbase Public API with the API Key
We can request the Public APIs now that we have an API Key. We will be working with the List Projects API.
fetchProjects function continues as follows:
async function fetchProjects(req) {
  ...
  try {
    ...
    const projectsUrl = `https://public.onboardbase.com/api/v1/projects`;
    const projectsResponse = await fetch(projectsUrl, {
      method: "GET",
      headers: {
        "Content-Type": "application/json",
        "Access-Control-Allow-Credentials": true,
        API_KEY: apiKey,
      },
    });
    const getProjectResult = await projectsResponse.json();
    const projects = getProjectResult.data ?? [];
    return {
      error: null,
      projects,
    };
  } catch (error) {
    return {
      error: "Something went wrong",
      projects: [],
    };
  }
}
We are sending the API key as the API_KEY header. The data field in the resulting response will contain an array of the projects for the user.
This endpoint will be deployed by Next.js at https://tutorial-oauth-integration.vercel.app/api/projects because we named the API file projects.
We will need the frontend to pick the code from the redirect URL page when a user lands there and makes a POST request to the https://tutorial-oauth-integration.vercel.ap with the code.
Inside of pages/oauth.js, we pick the code query params from the URL and send it to the backend:
export default function OAuth() {
  const router = useRouter();
  const { code } = router.query;
  const [projects, setProjects] = useState([]);

  useEffect(() => {
    const fetchData = async () => {

      const apiBaseUrl = "https://tutorial-oauth-integration.vercel.app/api";
      const postURl = `${apiBaseUrl}/projects`;
      try {
        const response = await fetch(postURl, {
          method: "POST",
          headers: {
            "Content-Type": "application/json",
            "Access-Control-Allow-Credentials": true,
          },
          body: JSON.stringify({ authCode: code }),
        });
        const result = await response.json();
        setProjects(result.projects ?? []);
      } catch (error) {
        setProjects([]);
        console.log("error", error);
      }
    };

    fetchData();
  }, [code]);

  return (
    <>
      <Head>
        <title>Onboardbase OAuth - Projects</title>
      </Head>
      <main className={styles.main}>
        <h1 style={{ padding: "1rem" }} className={inter.className}>
          Onboardbase OAuth - Projects
        </h1>
        <ul>
          {projects.map((project, i) => (
            <li key={i} className={inter.className}>
              {project.title}
            </li>
          ))}
        </ul>
      </main>
    </>
  );
}
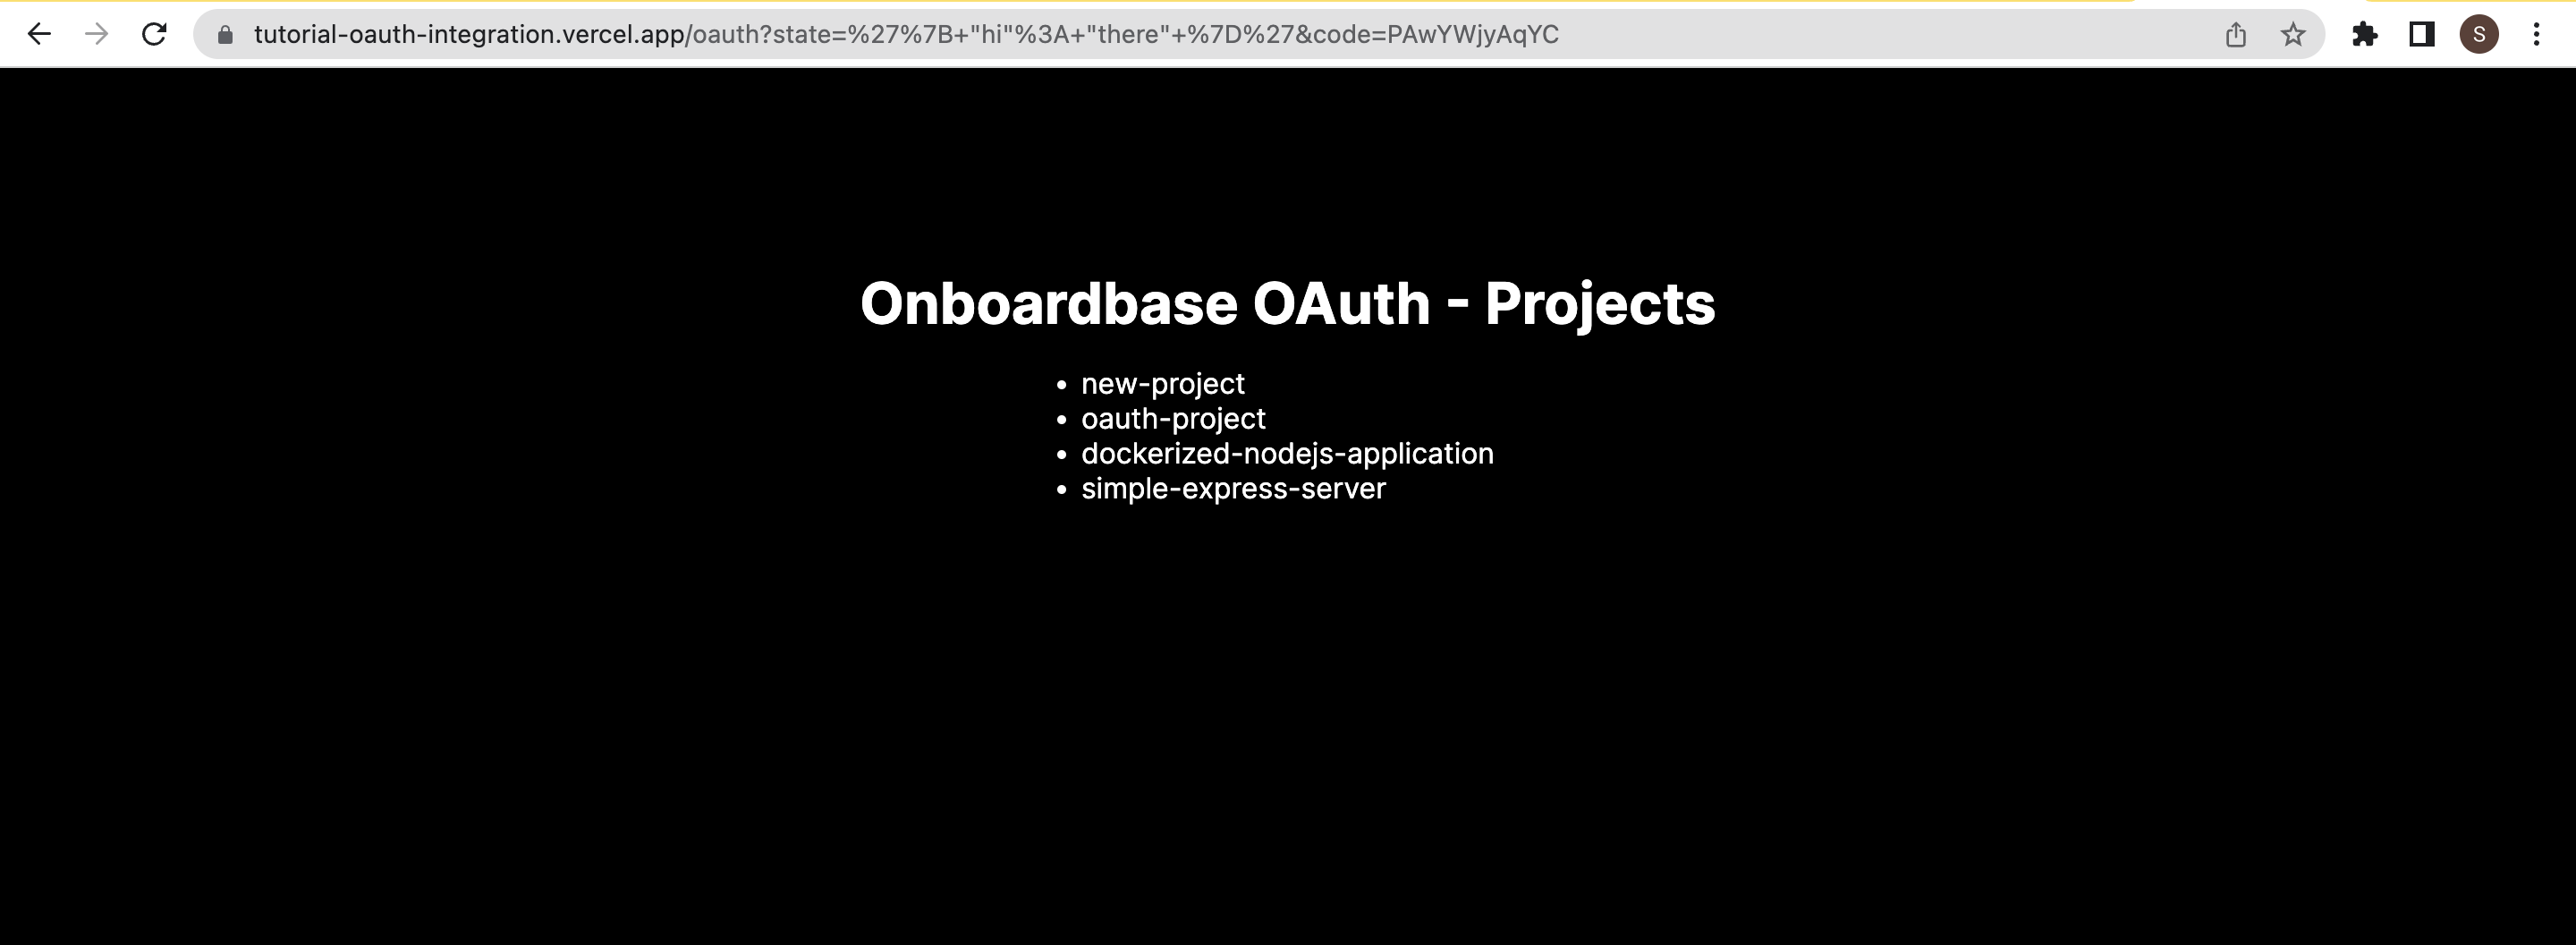
This page expects that the backend API responds with an array of projects. The projects are then mapped through, and their title displayed on the page
Walkthrough of the Project
The sample project is available at https://tutorial-oauth-integration.vercel.app/:

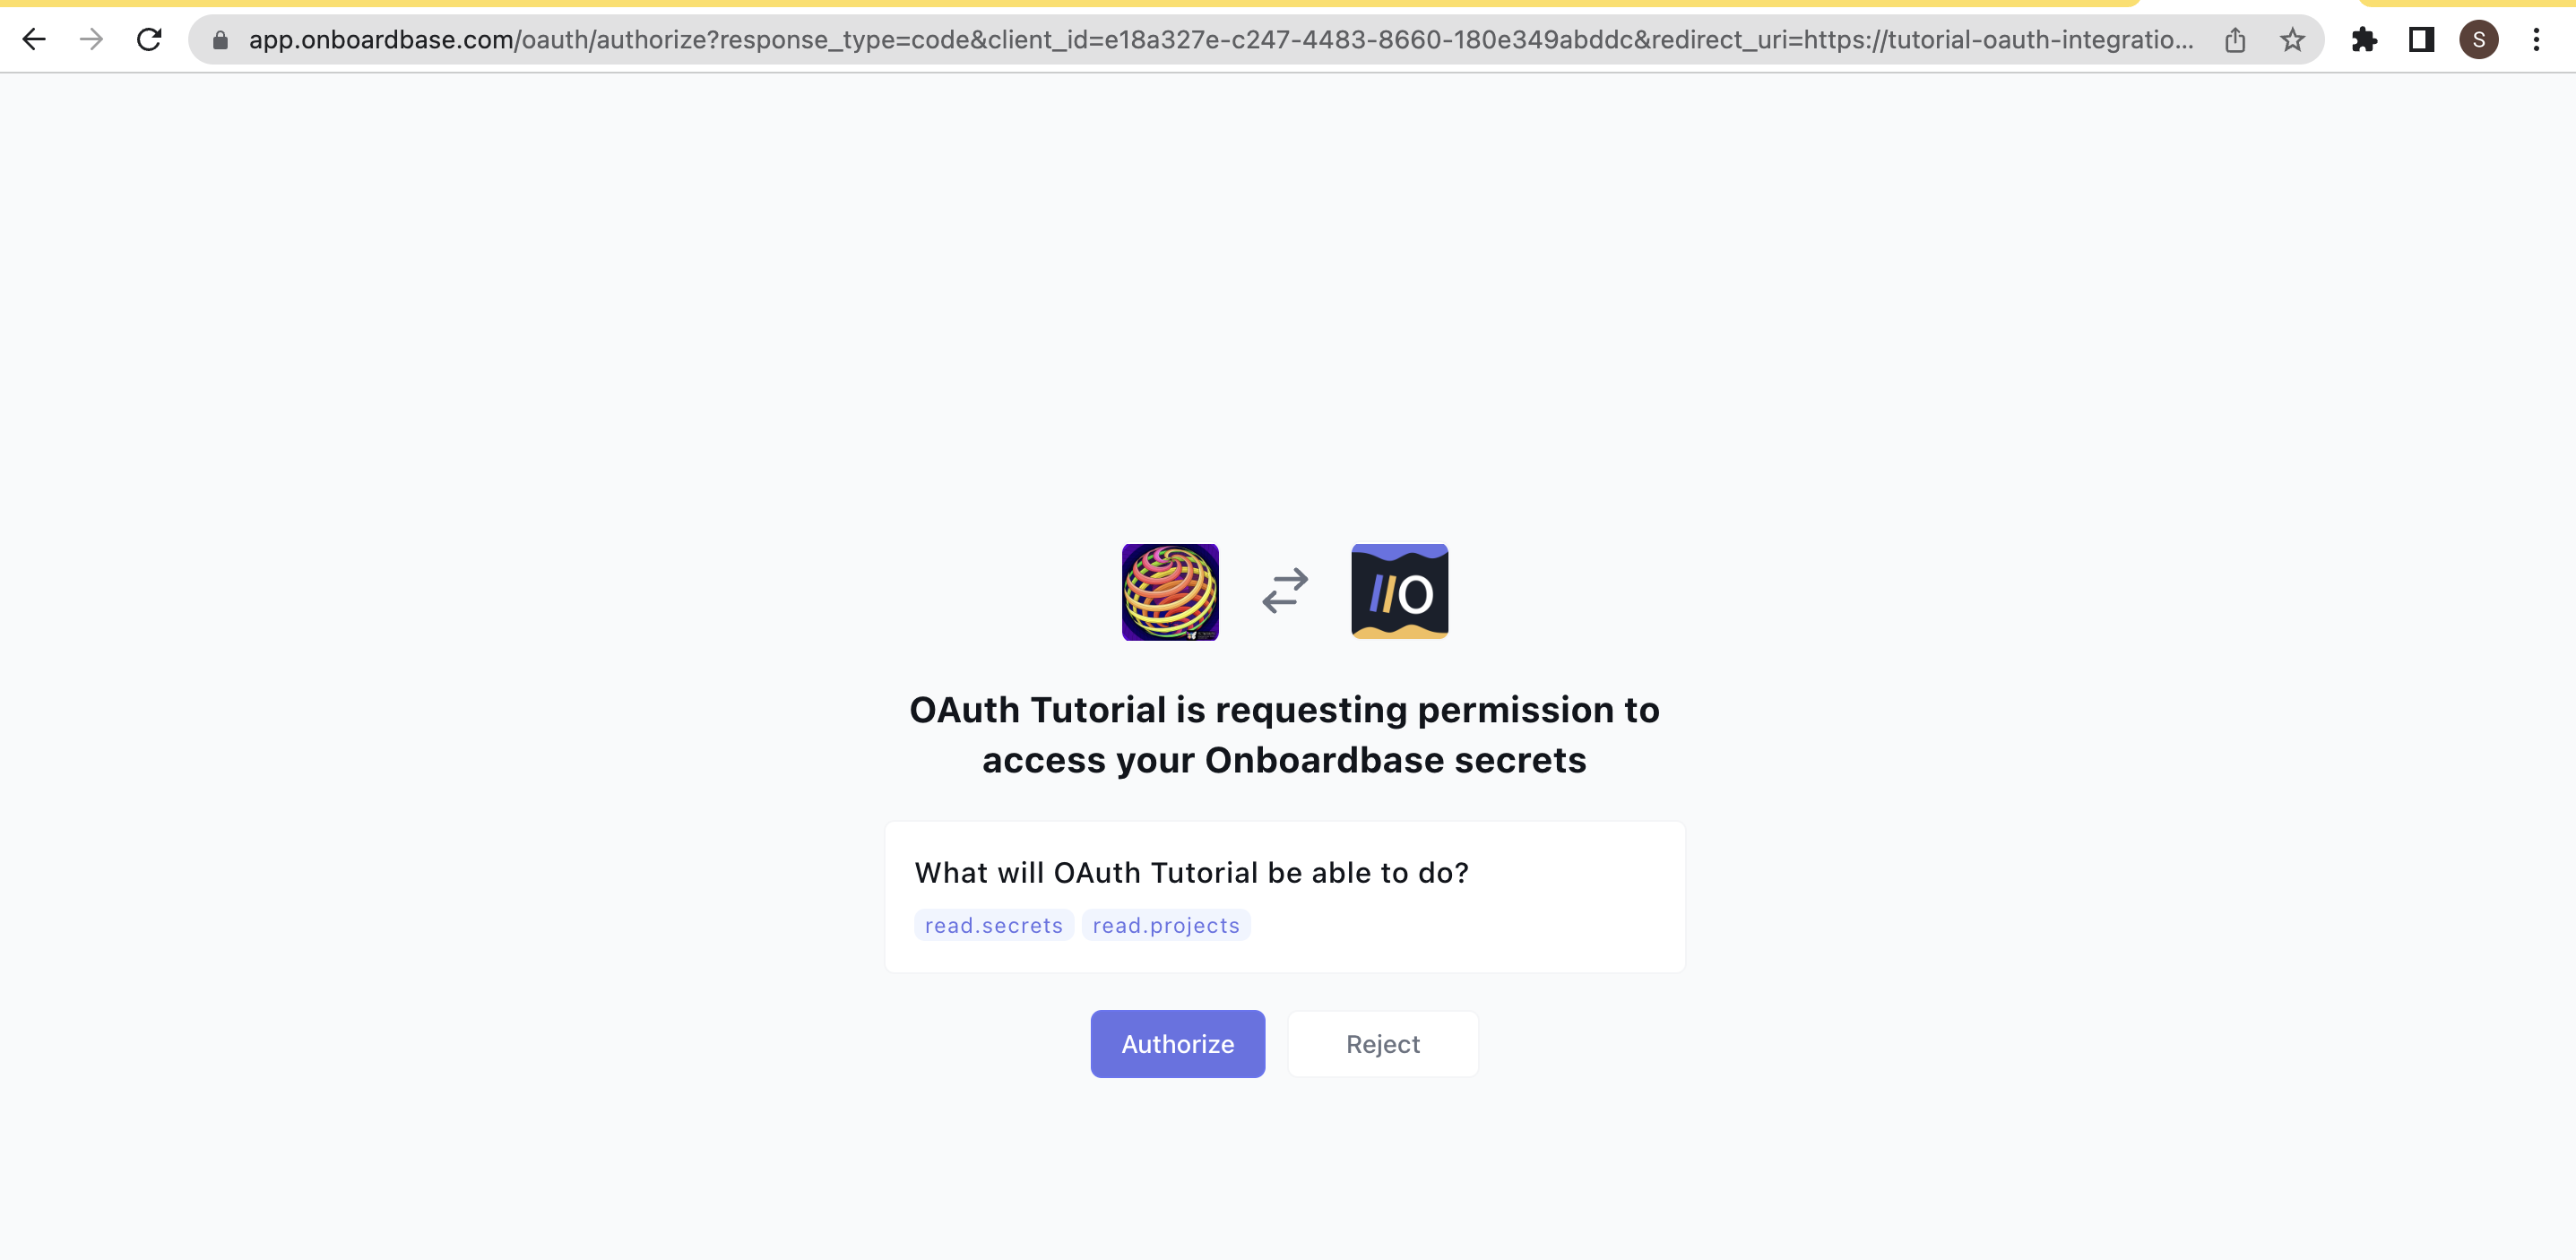
when a user clicks on Authenticate with Onboardbase they will be redirected to login to Onboardbase, or if they are already logged in to Onboardbase, they will be redirected to the following screen to Authorize Onboardbase:

The pages show the user the scope/permission the OAuth application requests. If the user clicks on.Authorize to authorize the request, they are redirected to the redirect URL specified for the OAuth application.

We have the list of Onboardbase Projects on the user's account. The source code for the sample project can be found here
Updated over 1 year ago
